Basically, teams that employ a zone defence on corners often leave the near side as a lawless area, so by effectively utilizing it, scoring opportunities can be greatly expanded.
This article explains the unique method to break through the near side with a renowned and powerful corner kick.
- Initial Setup and Objective
- Pattern 1: Via the Near Side to the Inside
- Pattern 2: When the Opponent Closes Down the Near Side
- Pattern 3: Utilizing the Outside
- Pattern 4: The Near Player Executes a Giseza Movement to Form a 3 on line near the Touchline
- Pattern 5: The Kicker Drops Back to Form a 3 on line
- Summary: Additional Notes
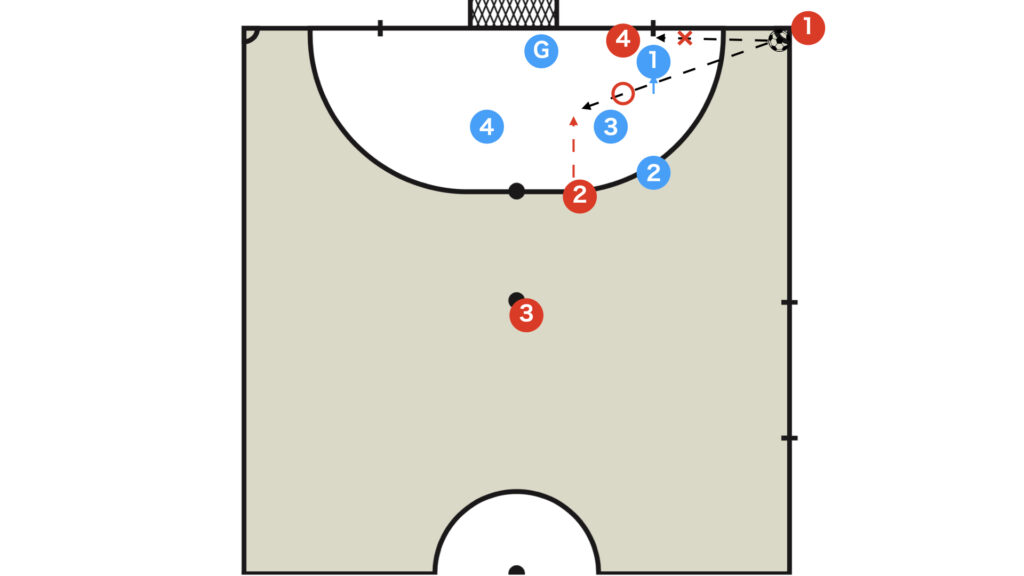
Initial Setup and Objective
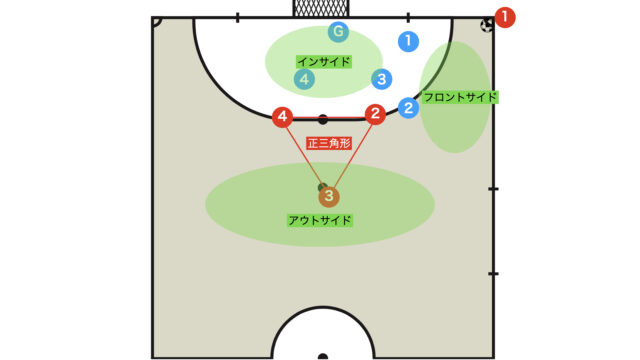
Initial Setup: A Conventional Triangle
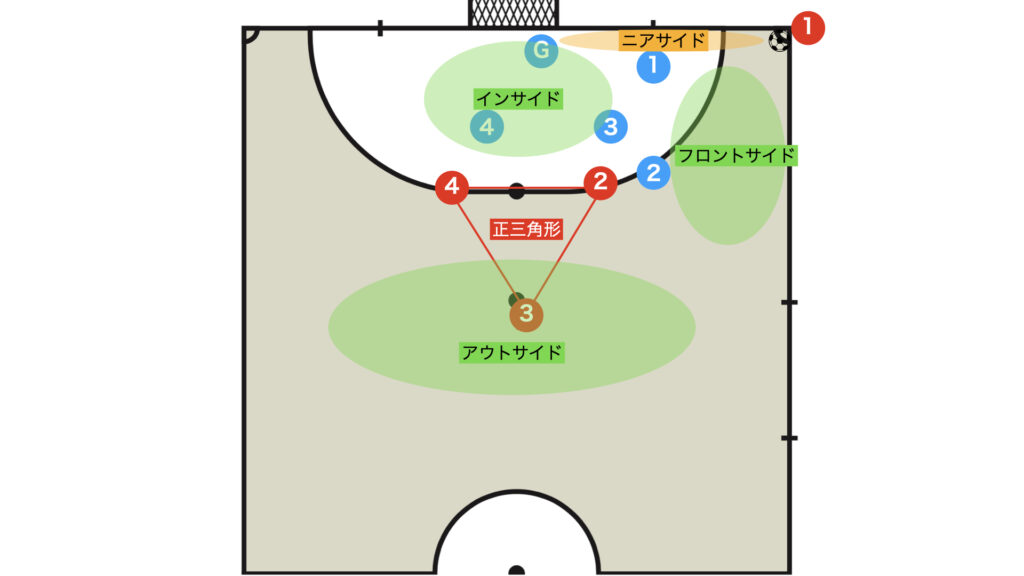
Target: The Near Side

Since the Y-shaped zone defence is fundamentally based on covering the area directly ahead, the near side tends to become an uncontrolled zone – so exploit that gap.
- Via the near side to the inside
- Directly to the inside
- Outside
- Goleiro (if no other option is available)
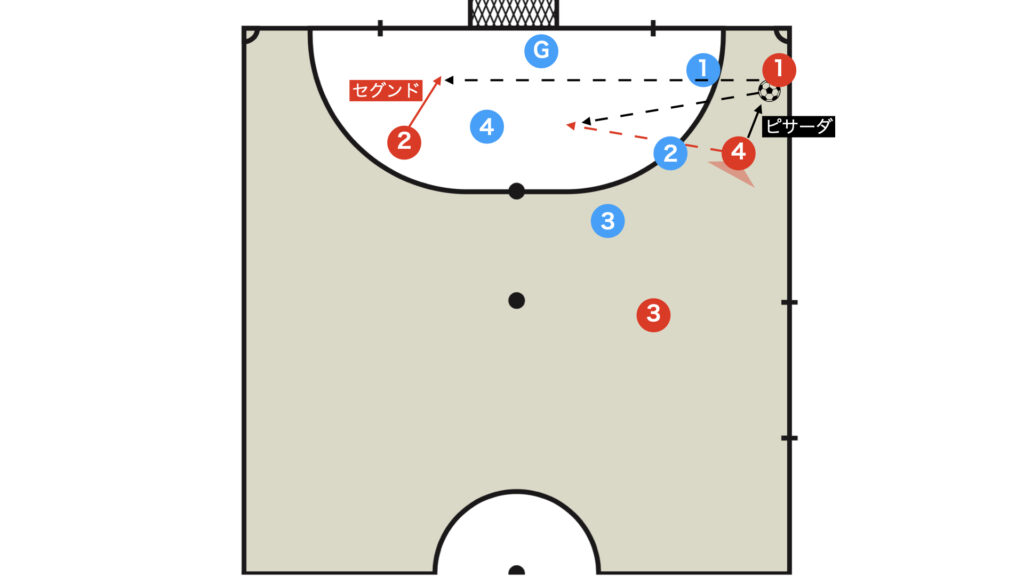
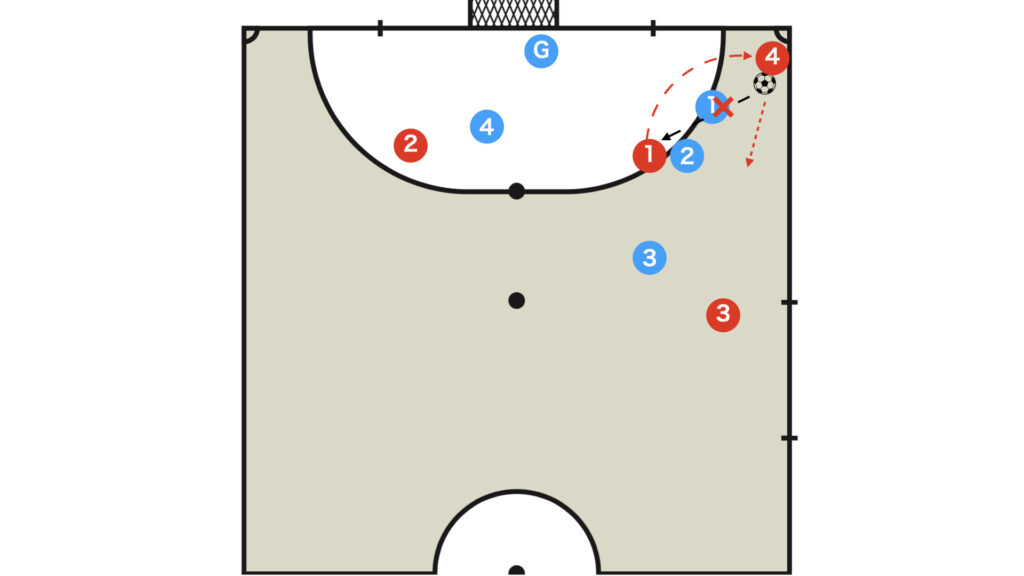
Pattern 1: Via the Near Side to the Inside
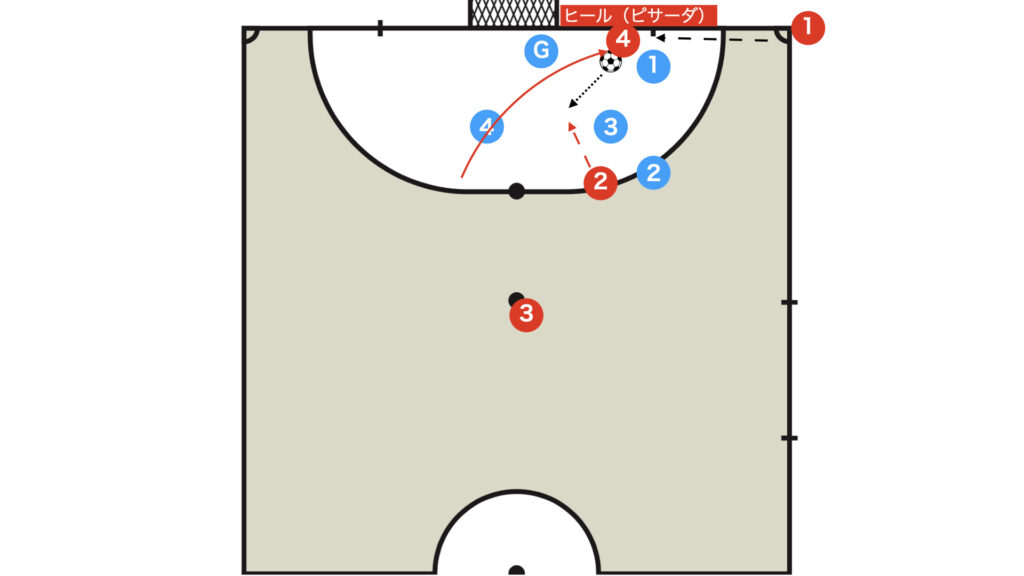
- Red 4 drifts to the near side and then, with a heel (pisada), turns back towards the inside.
- Red 2 shoots the pass that has turned back to the inside.
Red 4 should deliver the ball with a heel pass, as if linking with Red 2.
It is ideal to pass while keeping an eye on both teammates’ and opponents’ positioning and movements.

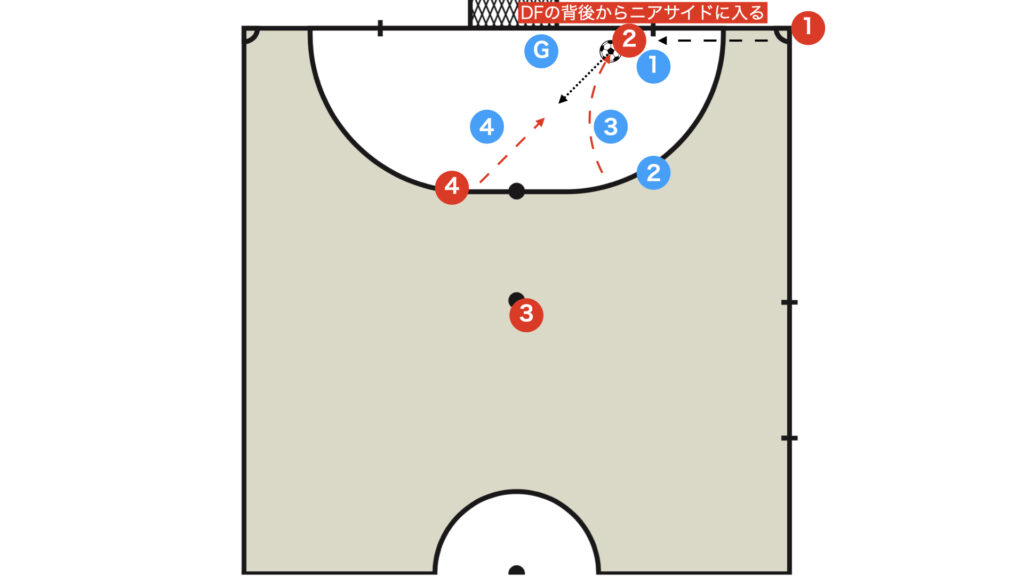
Pattern 2: When the Opponent Closes Down the Near Side
Exploiting the Gap between Blue 1 and Blue 3
Although not an ideal defensive tactic, if Blue 1, the near-side defender, closes down the near side, then aim directly for the inside.
Exploiting the Gap between Blue 3 and Blue 2
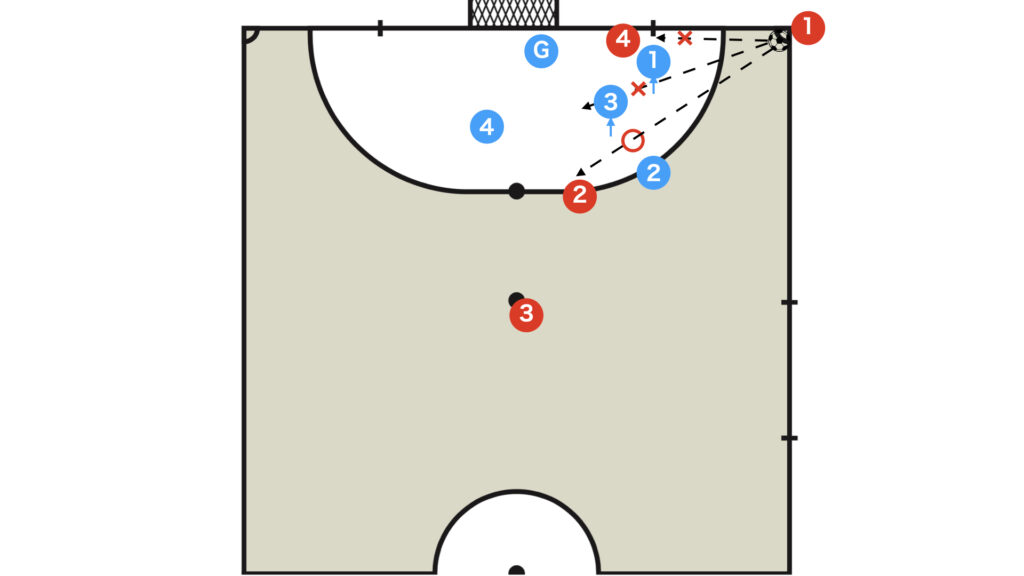
If Blue 3 is also drawn to the near side, then use the space between Blue 3 and Blue 2.
Although the opening movement is slightly different, the system remains essentially the same.
If you cannot receive the ball on the near side, it is also effective to have a player step in front of the opponent.
Pattern 3: Utilizing the Outside
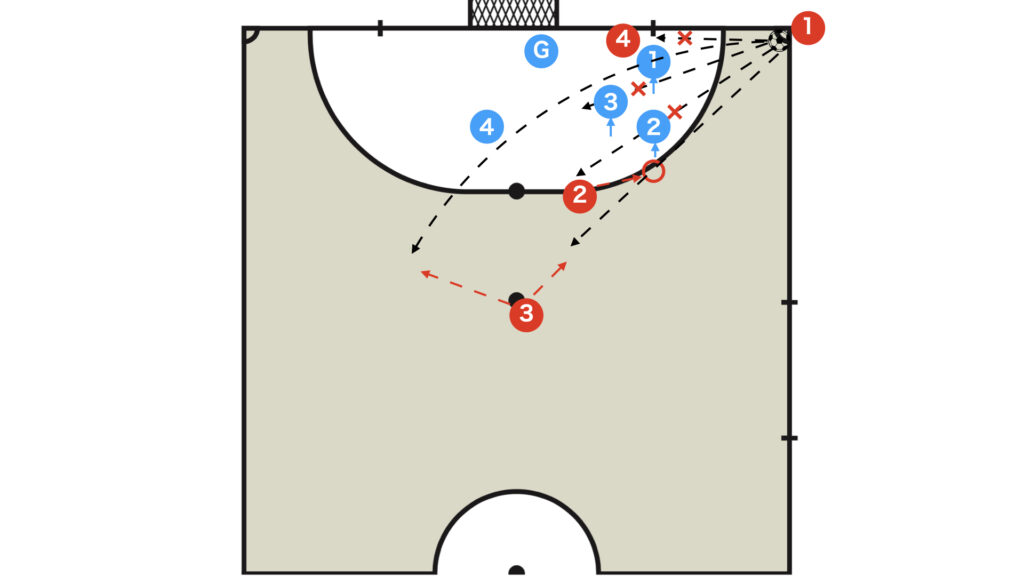
If the opponents completely cover the inside, the outside opens up – making a middle or volley shot using a dropped ball effective.
It is preferable to choose between the two based on Red 3’s preferred foot and individual strengths.
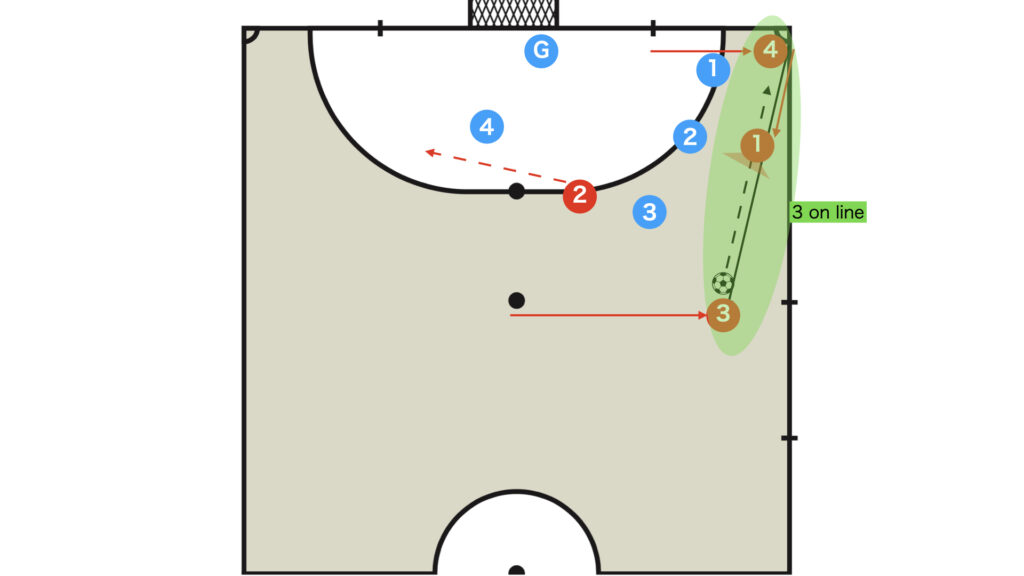
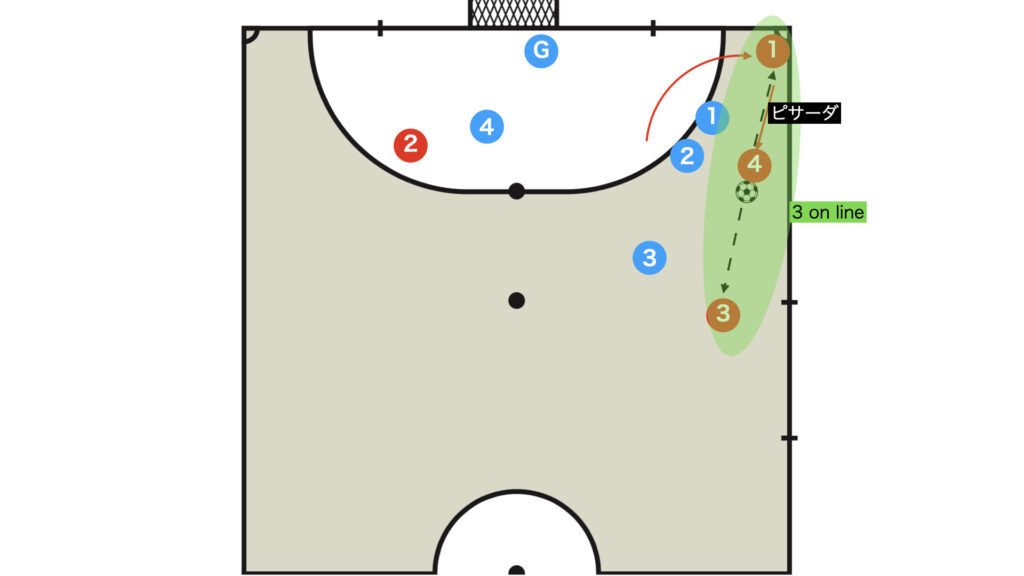
Pattern 4: The Near Player Executes a Giseza Movement to Form a 3 on line near the Touchline
If the Near Side is Congested, the Near Player Drops Back to Create a 3 on line near the Touchline

When the near side is congested, the near player drops back to form a 3 on line near the touchline.
Forming a 3 on line on the Side
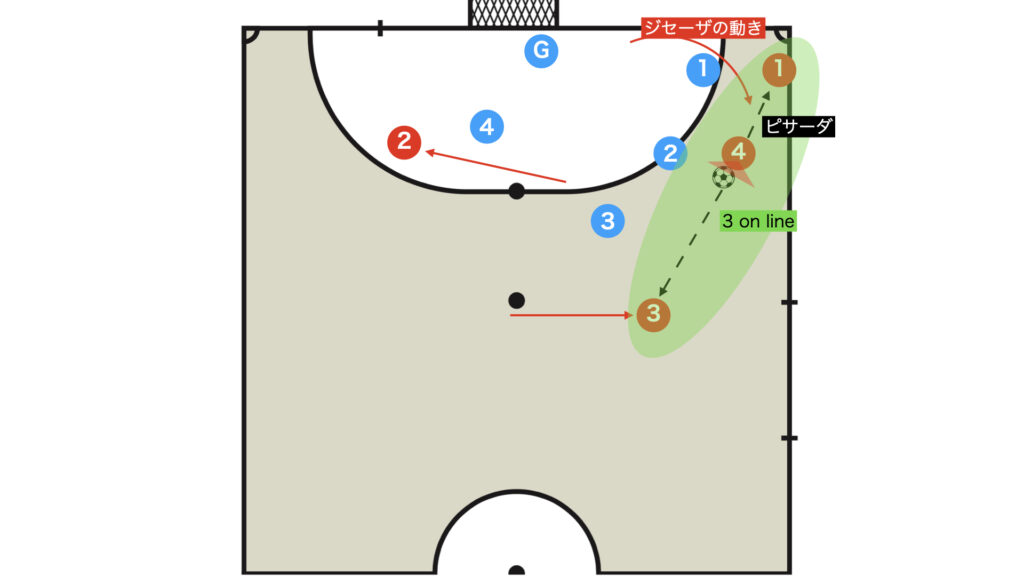
While the subsequent attacking variations can be diverse, the use and objective of the 3 on line in positional attacks remain essentially the same.
The essence is to have the opponent’s multiple lines absorb the pressure, allowing a run into the space behind (in front of the goal).
After Luring the Opponent, Pass to Penetrate the Middle
If you can break through with a pisada and receive the ball again in the middle, a shot can be easily set up.
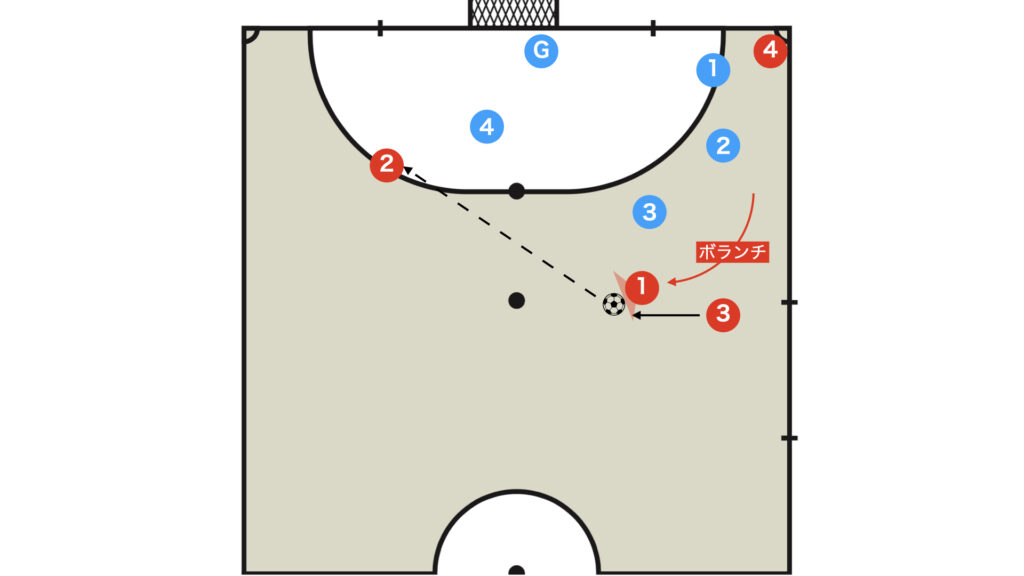
Pattern 5: The Kicker Drops Back to Form a 3 on line
The Kicker Drops Back While the Near-side Player Moves Near the Corner
It is also possible for the kicker to drop back and create a 3 on line on the side without the near-side player acting as a volante.
In this case as well, the objective and system remain the same as before.
If the Opposing DF (Blue 2) Clings from Behind, Execute an Ala Corta
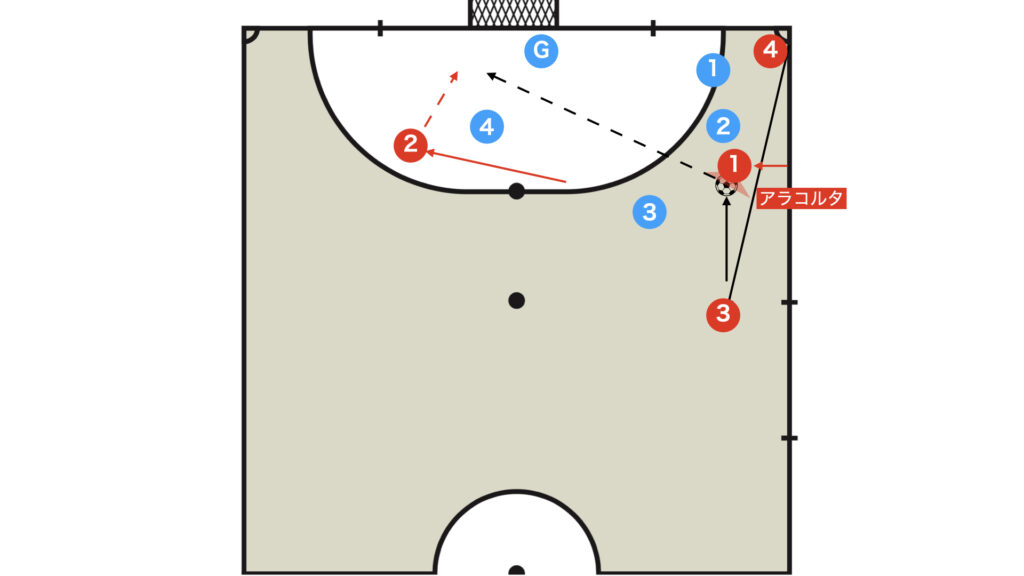
By moving close to the ball (Ala Corta) and performing a front cut with the instep, you can finish from a favorable position.
If Pressed from the Side, Bypass and Penetrate into the Middle
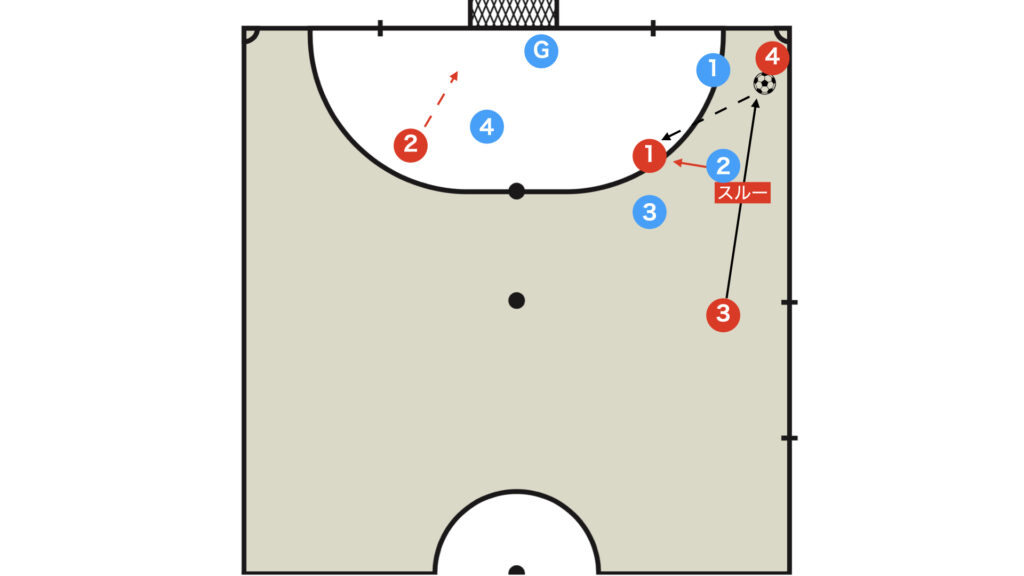
Ala Corta requires excellent communication and technical skills between the passer and receiver, making it a challenging move.
In such cases, bypassing and receiving the ball once more in front of the goal is an effective alternative.
If You Can’t Penetrate the Middle, Form the 3 on line Once Again
If the opponent anticipates your move and leaves you with no clear passing option, calmly reset and form the play again.
Reverting to the Original Position
Once the 3 on line is re-established, restart the attack following the same principles.
Summary: Additional Notes
Opening Movements
As shown in the diagram, it is acceptable for Red 2, rather than Red 4, to move to the near side during the opening.
It is advisable for each team to clearly decide on who moves in what manner.
After Forming a 3 on line near the Touchline, Employ a Volante

There is also a pattern where, after forming a 3 on line near the touchline, the central player acts as a volante (dropping back twice in succession).
Subsequent attacking variations vary, but they generally fall into two main patterns: delivering to Red 1 (utilizing the volante) or passing vertically to Red 4 for a pivo target.
When utilizing the volante, the first option is to aim for a shot. However, if the body positioning is unfavorable, reorganize the attack by either dribbling, using a pisada, or opting for a pass to Red 2.
Thank you very much for reading this article to the end.
If you found this article useful, please consider sharing it using the social media share buttons above.
We regularly share valuable insights on futsal tactics on Twitter, so if you haven’t followed us yet, we’d appreciate your support!
We are committed to raising the level of futsal in Japan by sharing high-quality information through discussions with individuals who have coaching experience in the F.League and overseas.
If you have any questions or notice any mistakes, feel free to leave a comment below.
We update our articles regularly, so if you’d like to keep reading, please bookmark our site or search for “FutTech”!